


In order to automate things, you should know how to do it manually.
This Article will help you understand how to setup Centos VM/ Ubuntu VM Manually on a virtual box VS Automatically on a virtual box
Some pre-requisites that we need before we start
Chocolatey for windows / Brew for Mac
Oracle VM Virtual box
Git Bash for windows / Terminal for Mac
Vagrant
You will need CentOS Minimal ISO and Ubuntu 18 Server install ISO
Let's start ....
Virtual Machine Manually
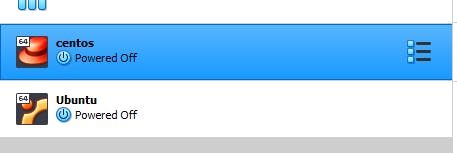
- Once you have your Oracle VM installed you will see a screen like this.
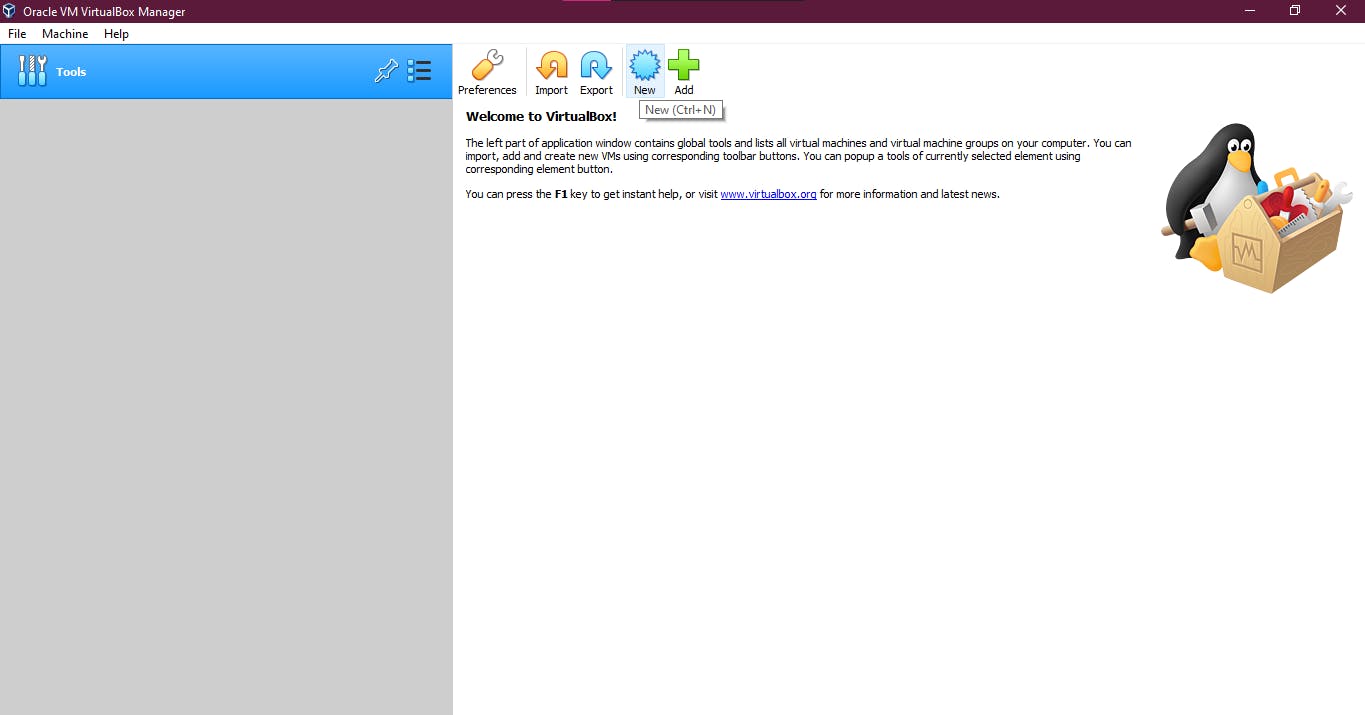
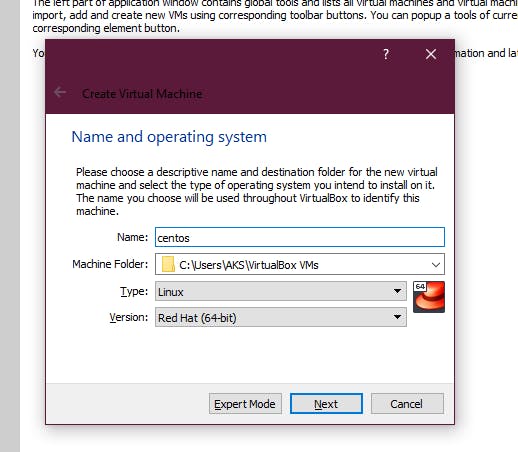
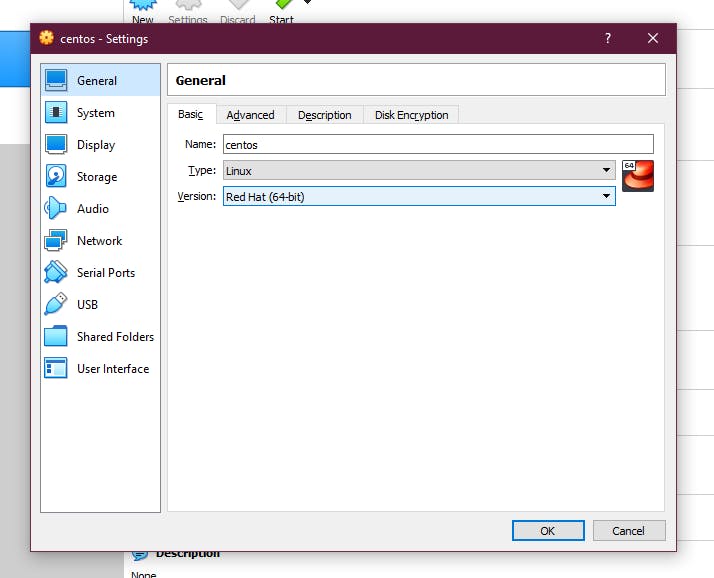
2. Click on the option NEW. Give it a name Centos and select the Type as Linux as well as the version as Red Hat(64-bit)
3. Once you click next, you will see the option to allocate Memory size. You can select it as your preference, at least allocate 1 GB. 4. Once you are done with that you will see a screen for Creating a Hard Disk you can go with the Create Virtual hard disk now option

5. Now it should ask you for the type of hard disk, which you may select as VDI

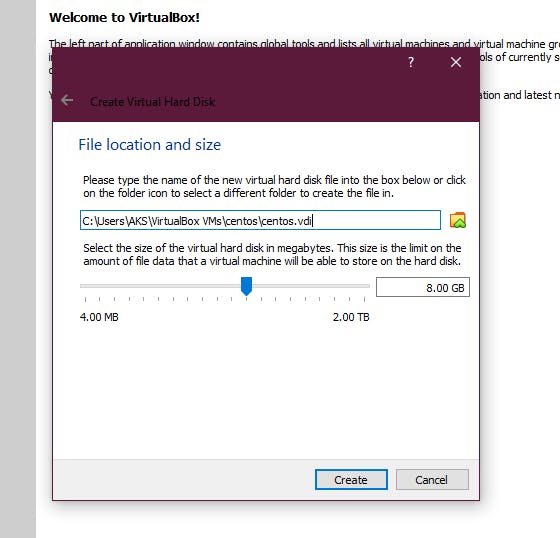
6. Now this hard disk will take space from your physical hard disk in your system, you can go with Dynamic here to save the unused space. Once you proceed you will see by default the space which was allocated. Go ahead and create it.
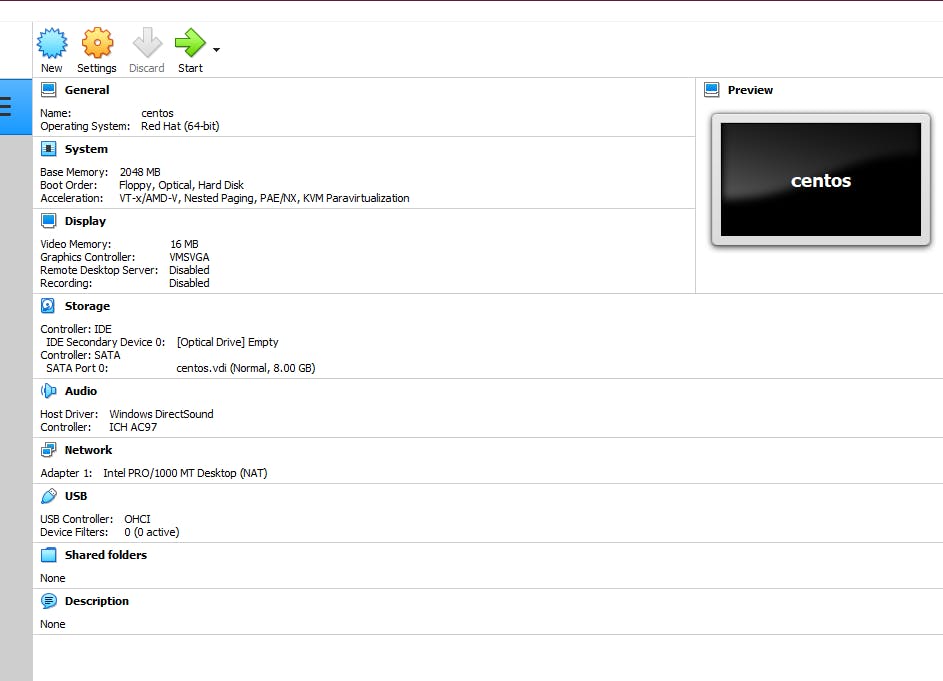
- Finally the virtual machine was created.
Now I would like you to create a new VM for Ubuntu.
Hint: Select the Version as Ubuntu (64-bit).
Once you are done you will have 2 VMs
Let's Install OS on the Virtual machines
- Go to VM, select the Centos Machine, and click on Settings
2. Select the option Storage. You might see a CD icon that says Empty. Once you click on it you will see an Optical Drive with a dropdown menu.
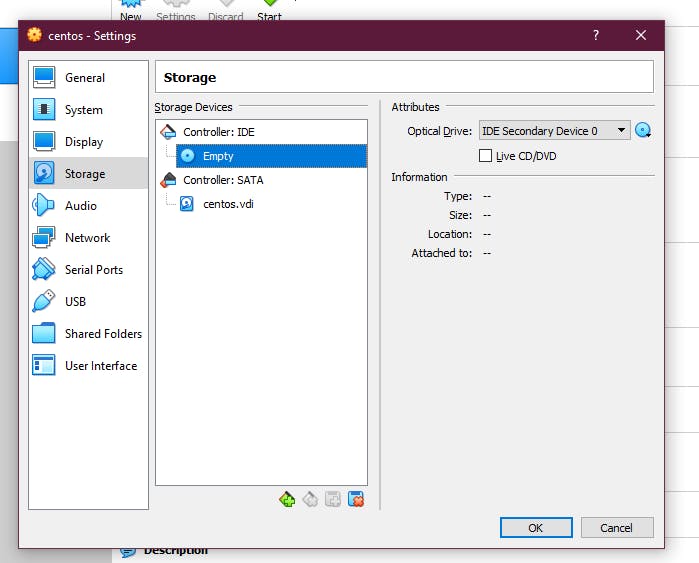
3. Open the Optical Drive Dropdown, click on Choose a disk file and select the CENTOS ISO that we downloaded.
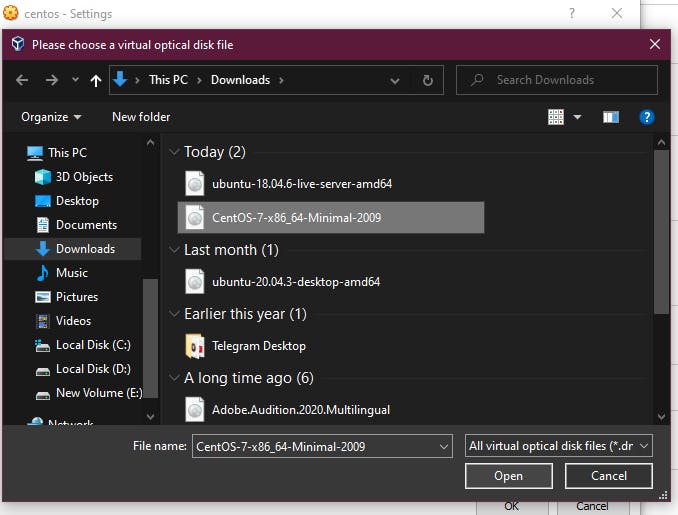
Once it's loaded, click on the Live CD/DVD option and click OK.
One last setting that we need to change before we start our Machine, again do select the CENTOS VM, and go to **Settings>Network>Adapter 2 > Enable Network Adapter > Attached to Bridged Adapter > Name: Whatever you using to connect to the internet (wifi, ethernet) **
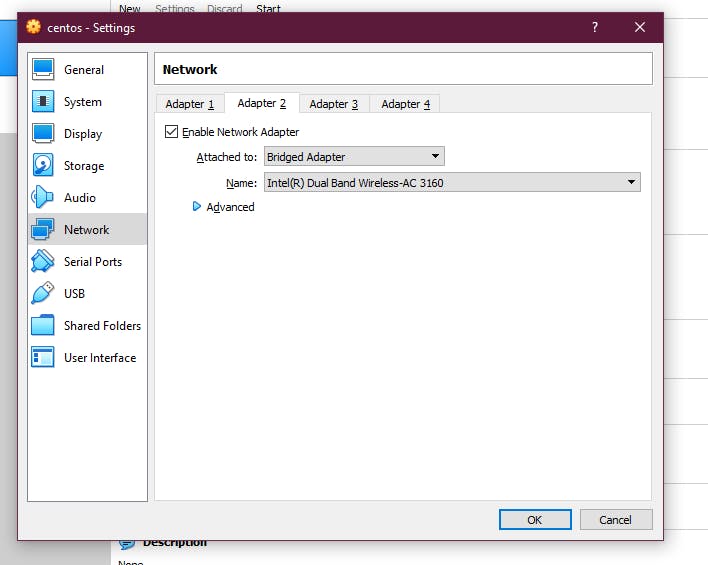
A computer can have multiple adapters, here we are using 2nd adapter so because the 1st adapter will give us a private IP and we won't be able to connect to it, so we will enable 2nd adapter and assign it as Bridged Adapter so we can connect to it using SSH.
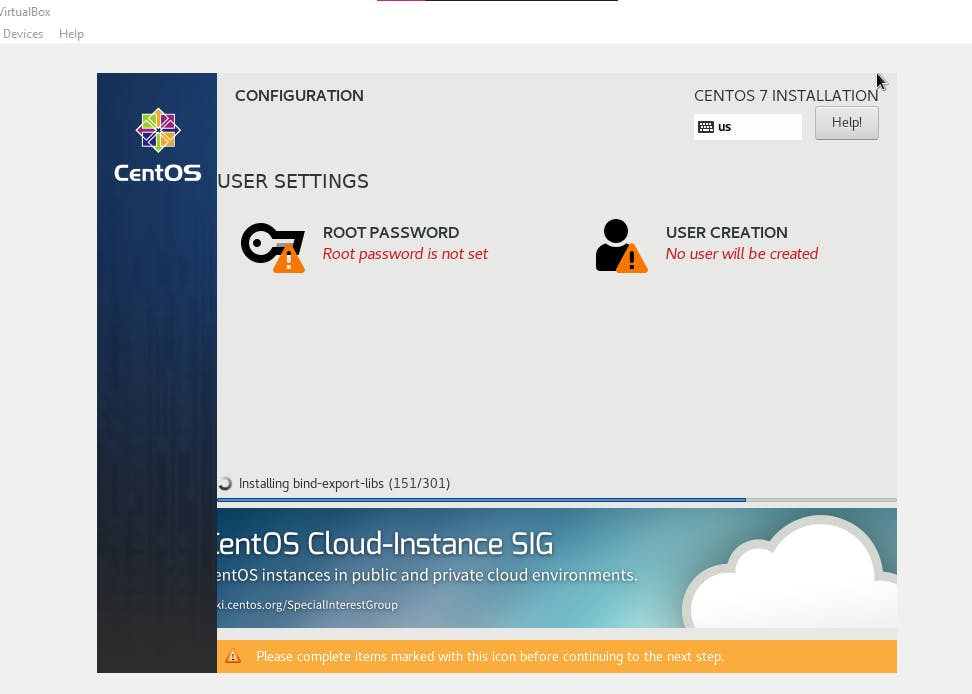
- Now once done, you can start your Machine. You might be prompted to choose the language. Since this is a wizard-based setup, you will be prompted to complete Root Password and User Creation
- Once Done, you might want to reboot the system, after booting it up you will have to give the user id and password that you created in step 6. And you are done. Now you might want to try to connect using Putty, for this you need to download putty, give ** ifconfig** into the system and get the IP address which we mentioned as Bridged and then give the same IP in putty and you should be able to connect to it.
Now I would like you to do the same for Ubuntu.
Virtual Machine Automatically

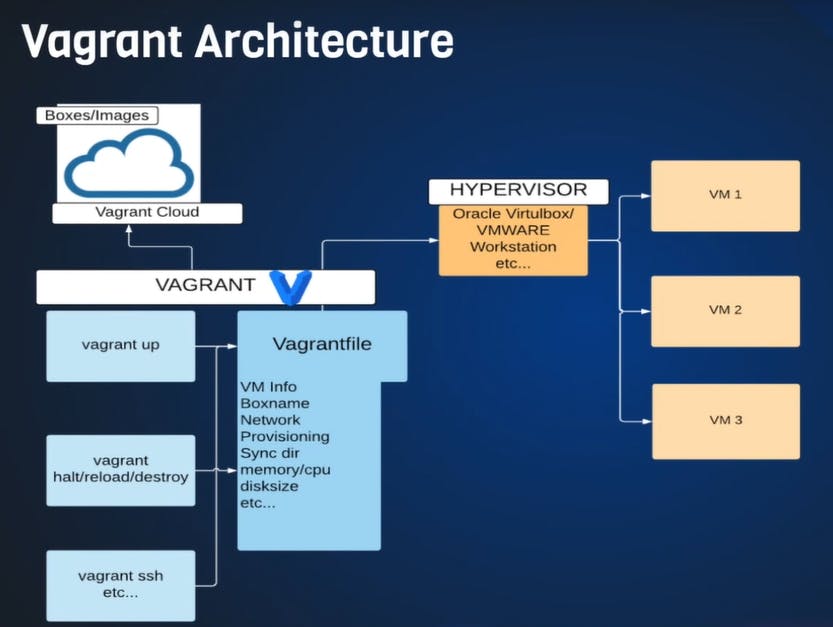
What is Vagrant?
Vagrant is an open-source software product for building and maintaining portable virtual software development environments. Anything that you do with your VM manually we can do with Vagrant.
Since manually it takes a lot of steps to set it up, also it's really tough to replicate multi VM if we want to do it manually, whereas in the case of Vagrant there is no os installation, we create through images also know as vagrant boxes. They are ready-made OS in the vagrant cloud where we just need to download it.
In order to set this up or make any change we will be using a Vagrantfile.
Let's start ....
Since Vagrant is not a GUI, we need to open git bash, or if you are a mac user you can use the default command prompt.
Now go to a directory by giving cd d/, and create a directory with any name using the command mkdir vagrant-vm/
now move to the new vagrant directory by giving the command cd vagrant-vs/ and create a directory for centos as mkdir centos/ and another directory for ubuntu mkdir ubuntu/. Move into the centos directory using cd centos/
Now we need to issue a vagrant command **(vagrant init + image name)**which will create a vagrant file for us. You can get the image name from Vagrant boxes website
You can issue the command vagrant init geerlingguy/centos7 where the geerlingguy/centos7 is the centos image.
It should take a couple of seconds to do this, once done, if you give the command ls you should be able to see the Vagrantfile, you can view this file using the command cat Vagrantfile.
If you have made it to the last step, now you can issue the command vagrant up, this command will read the Vagrantfile in the current centos library and create a VM for us. Though at the first occurrence it has to download the box which might take some time, though after this it would be easy and fast to create VMs.
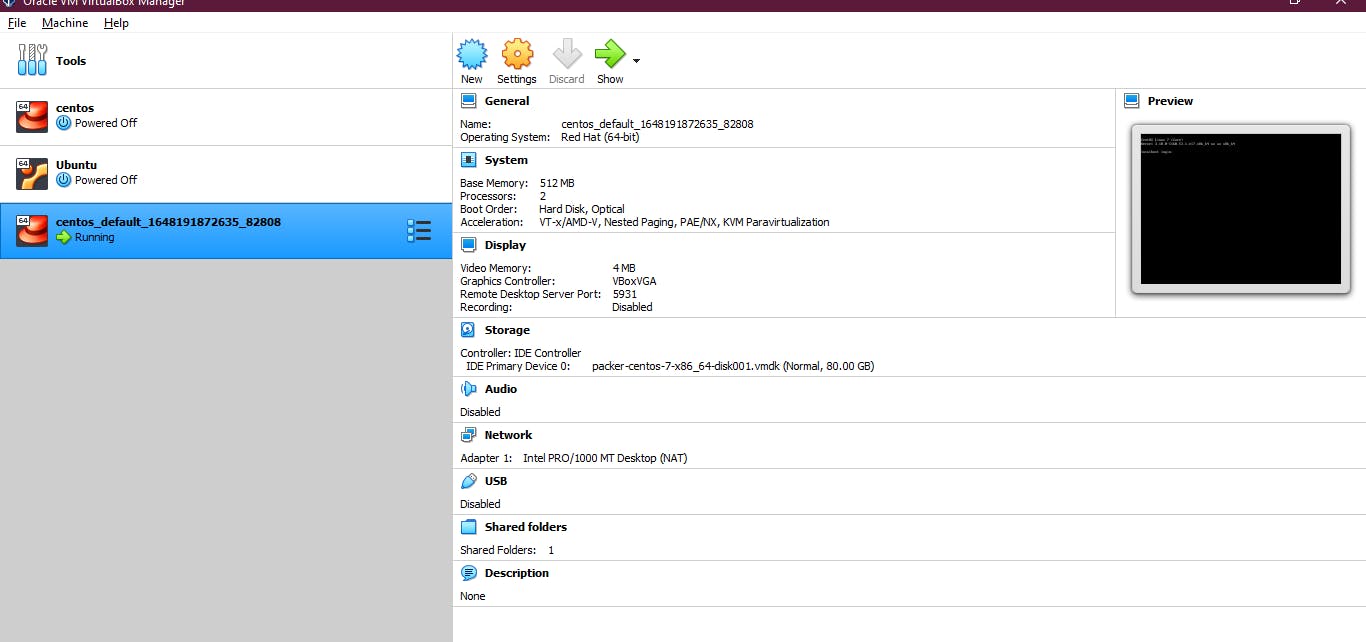
Once done, you should be able to see the virtual box in the Oracle VM application, we don't need to connect from there so we need to issue the command in the git bash in the same centos directory as vagrant ssh and you should be in.
In order to verify the same, issue the command whoami and it should let you know that you are logged in as a vagrant user, in order to shut down the VM using the command vagrant halt after giving exit.
Now I would like you to set up for Ubuntu 18. for ease I have mentioned the commands below.
$ vagrant init ubuntu/bionic64
$ vagrant up
$ vagrant ssh
$ vagrant halt-> to shutdown
$ vagrant destroy -> to delete the vm
Thank-you!
I am glad you made it to the end of this article. I hope you got to learn something, if so please leave a Like which will encourage me for my upcoming write-ups.
Connect with me on Linkedin
Start your own blogs